Comment restaurer un site Web à partir des archives Web
Ce tutoriel explique comment vous pouvez récupérer un site Web à partir de la Wayback Machine.
Téléchargez vos fichiers
Trouvez d'abord l'URL d'archive de votre site Web sur https://archive.org/web/. Par exemple: https://web.archive.org/web/20150309210900/http://example.com/
Notre logiciel ne fonctionne qu'avec une date précise. Sur archive.org, vous pouvez trouver une date précise en allant dans le calendrier et en cliquant sur un cercle bleu:

Une fois que vous avez choisi un URL d'archive, vous pouvez l'utiliser avec la démo gratuite ou le service payant:
Les fichiers sont envoyés à votre adresse e-mail. Après, vous pouvez poursuivre le processus d'installation ci-dessous.
Hébergement
- Make sure that you use an Apache server. Almost all cheap hosting services (Hostgator, Godaddy etc) use Apache. Also note that “Managed WordPress” hosting services do not work.
- For most users, we recommend shared hosting from Namecheap ($45/year).
- EASY package: For novice customers with 1 or 2 websites, we recommend our own all-inclusive hosting at $12/mo. We then install the site for you (at no additional costs) on one of our own Apache servers. You'll receive your own cPanel access, and a website backups.
- If you want to host a PBN network of 10+ WordPress sites, then we recommend EBN.

Installation Method 1: The Easy Method
-
1. Register the domain with your hosting company. If you have registered the domain elsewhere, then create an add-on domain in the cPanel of your hosting company. Here is a tutorial from GoDaddy, that explains how to create an add-on domain.
-
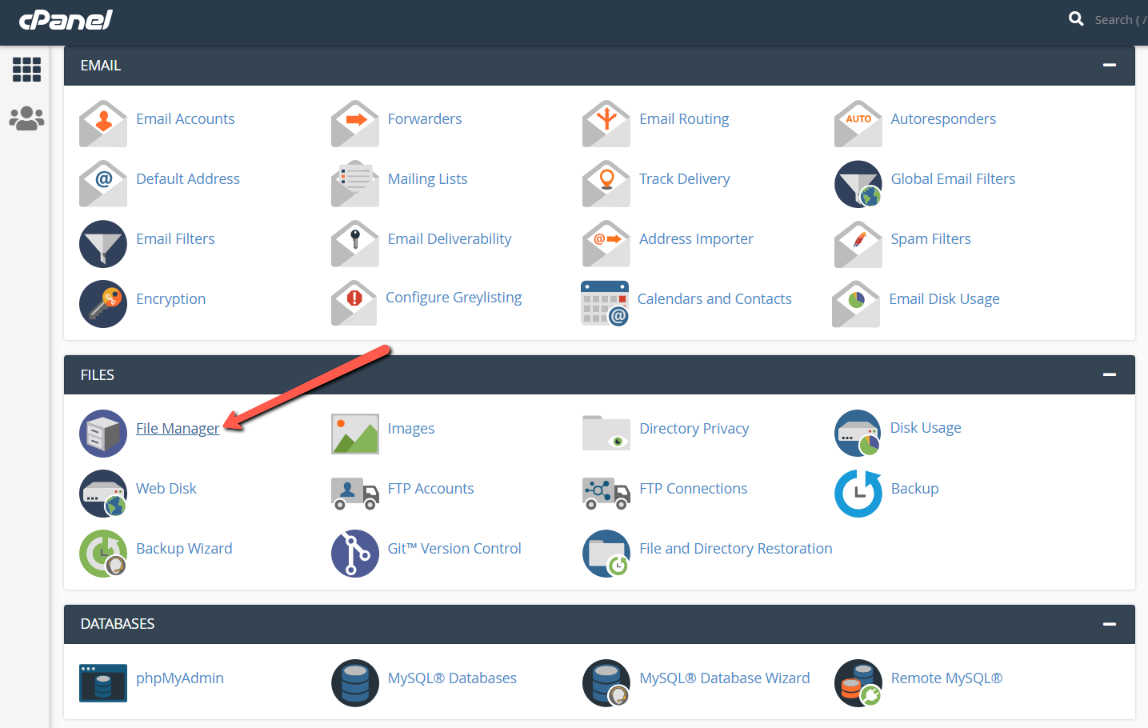
2. Login to cPanel and go to "File Manager", :

-
3. Browse to the root folder of your domain. Normally this is "/public_html/example.com", as shown below. For this tutorial, we used the domain buy-searchengine.com. Then click on "Upload":

-
4. Then upload the ZIP file, as shown in the picture below. This assumes that you have already downloaded the ZIP file from waybackmachinedownloader.com.

-
5. Extract the ZIP file:

NOTE: In the Zip file, there's a file called .htaccess. It's a "hidden" file. With some control panels, the .htaccess file isn't extracted. If the .htaccess file is not present on the server, then your front page might look weird, and links to other pages won't work.
If you have problems with this, then upload the .htaccess file separately: extract the file on your own computer, and upload it to the server. Place it in same folder as index.html.
-
6. That's it! If you purchased the domain and the hosting from different companies, then you still have to change the name servers at your domain registrar, and change them with the name servers from your hosting company.
-
7. If you want to edit the front page, then go to the File Manager and edit the index.html file, using a text editor. You might find it easier to copy part of that file and edit it with an online HTML editor.
WordPress installation instructions
If you also ordered the WordPress conversion, then wait until one of our developers sends you a ZIP file with WordPress files. This might take up to 48 hours after the scraping has finished.
It might sound strange, but you can not use a "Managed WordPress" hosting package.
It doesn’t provide enough rights to edit the database.
However, any cheap shared hosting package works, as long as it uses Apache.
You can get this from providers such as Godaddy or Hostgator. We recommend Namecheap because it’s good enough and costs only $35/year.
- 8. Upload and extract this ZIP file as described above in step 2-6, in the same way as yep 2-6, in the same way as you would do with a zip file with HTML files. In the ZIP file there is also a folder called "database". If you want to save some time, you can remove this folder from the ZIP file, because you do not need to upload it. You will need the folder later though.
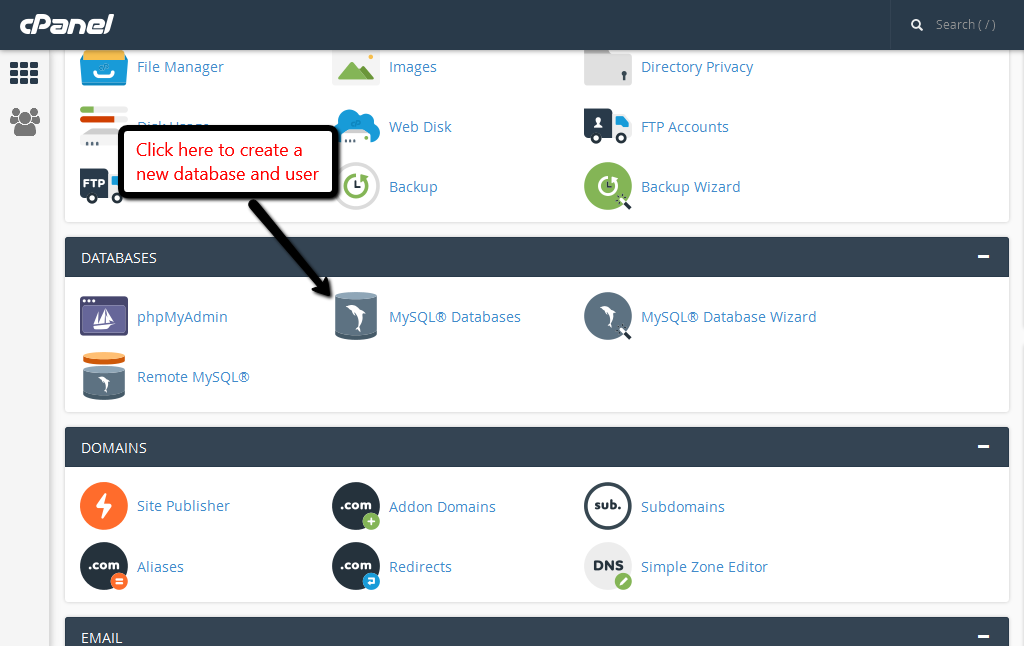
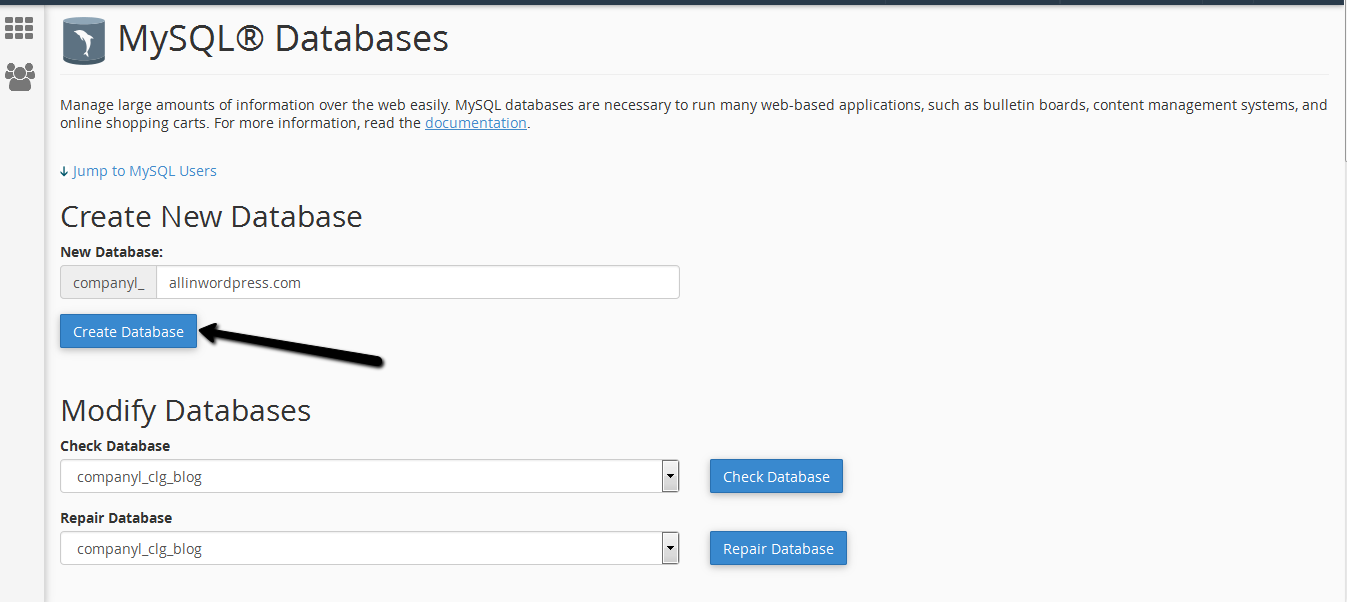
- 9. Go to your "cPanel" and open "MySQL Databases". Create a new database. You can name it anything, but in the screenshot below we use the name allinwordpress.com. You will need this name later, so pick something easy.
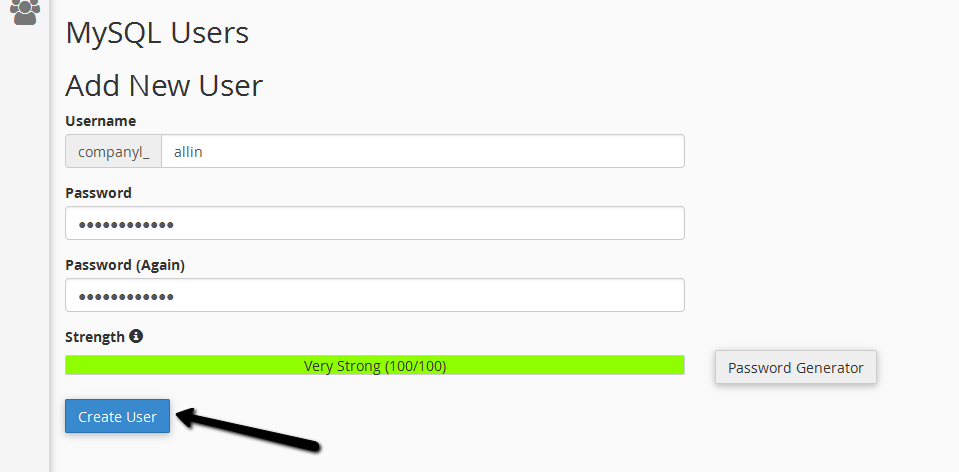
- 10. Create a new user and password. The name can be anything, but you'll need it later.
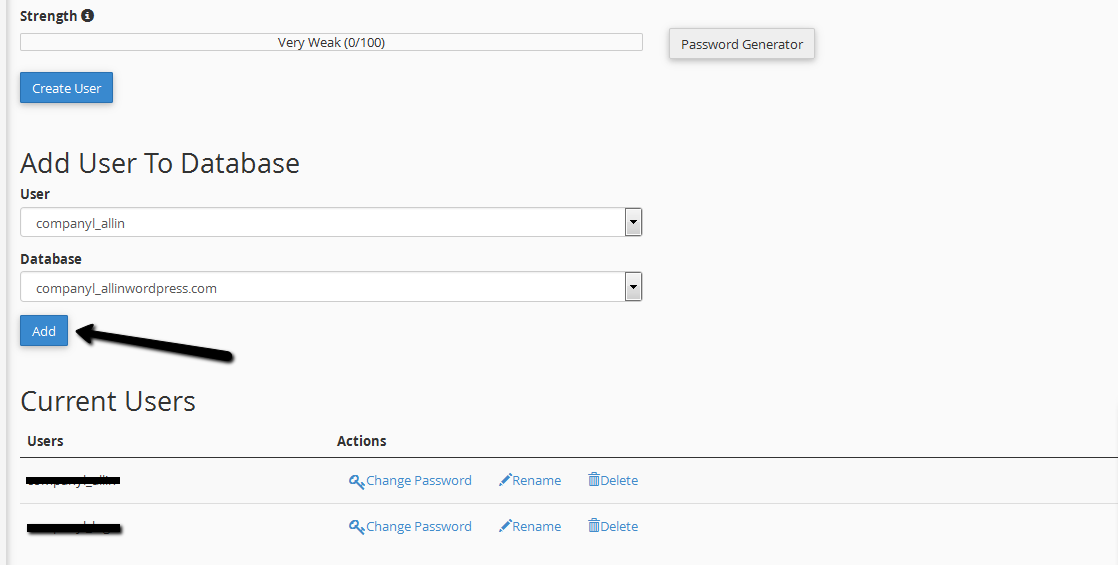
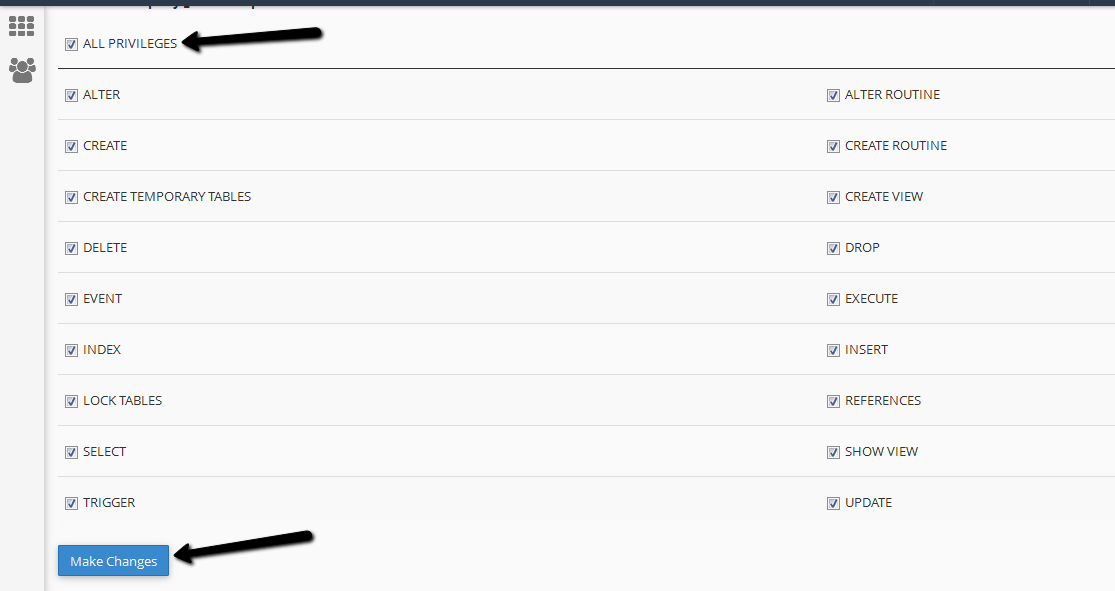
- 11. Add this user to the database. Give your new user access to all privileges.
- 12. On your own computer, unzip the folder called "database". For example, unzip this to your desktop.
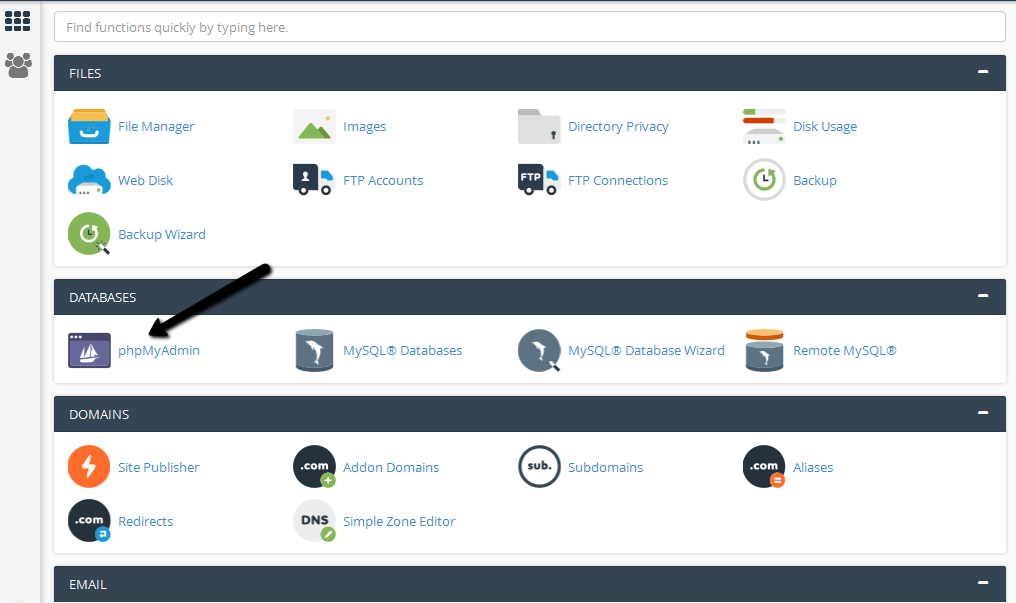
- 13. Go to your "cPanel" and open "phpMyAdmin".
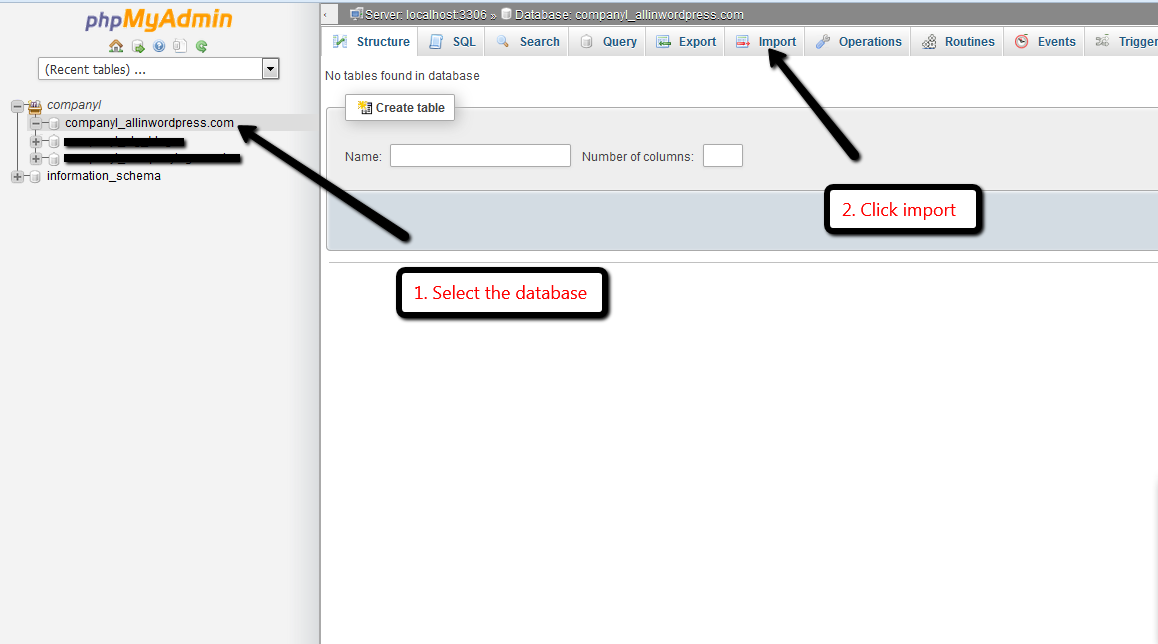
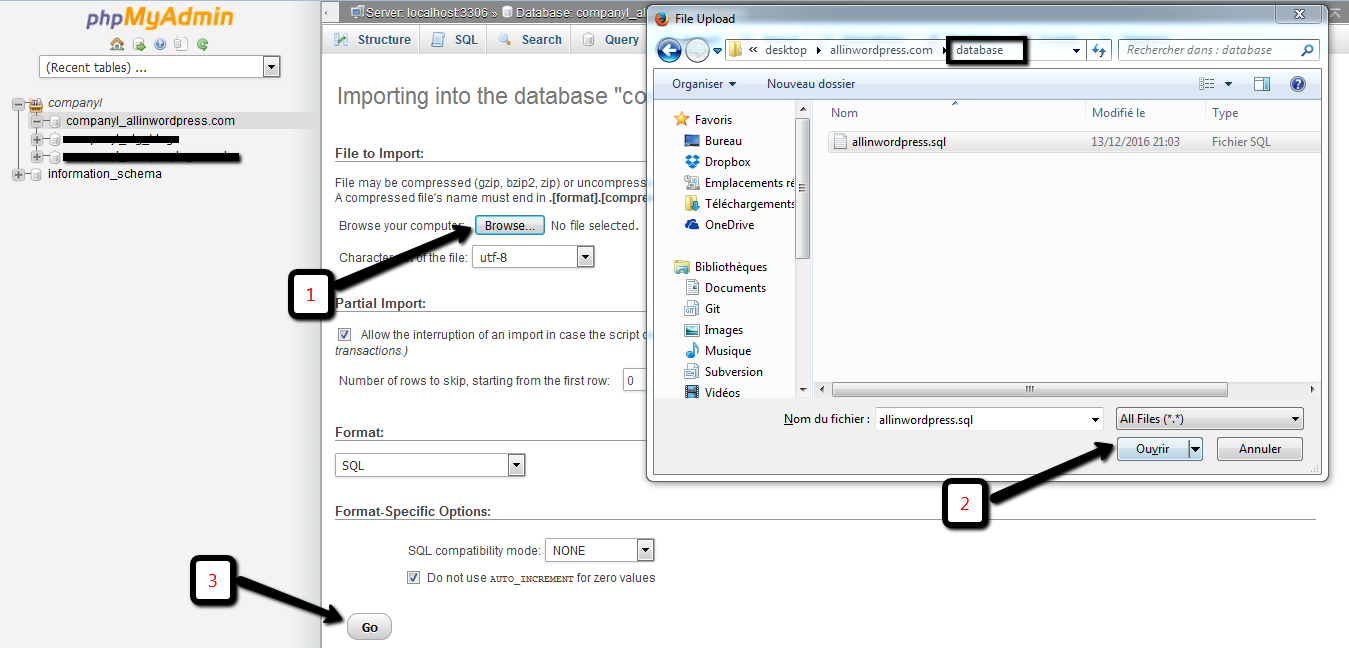
- 14. First select your database on the left panel, by clicking on it. Then click "import" and import the database. This is the .sql file in the folder called "database".
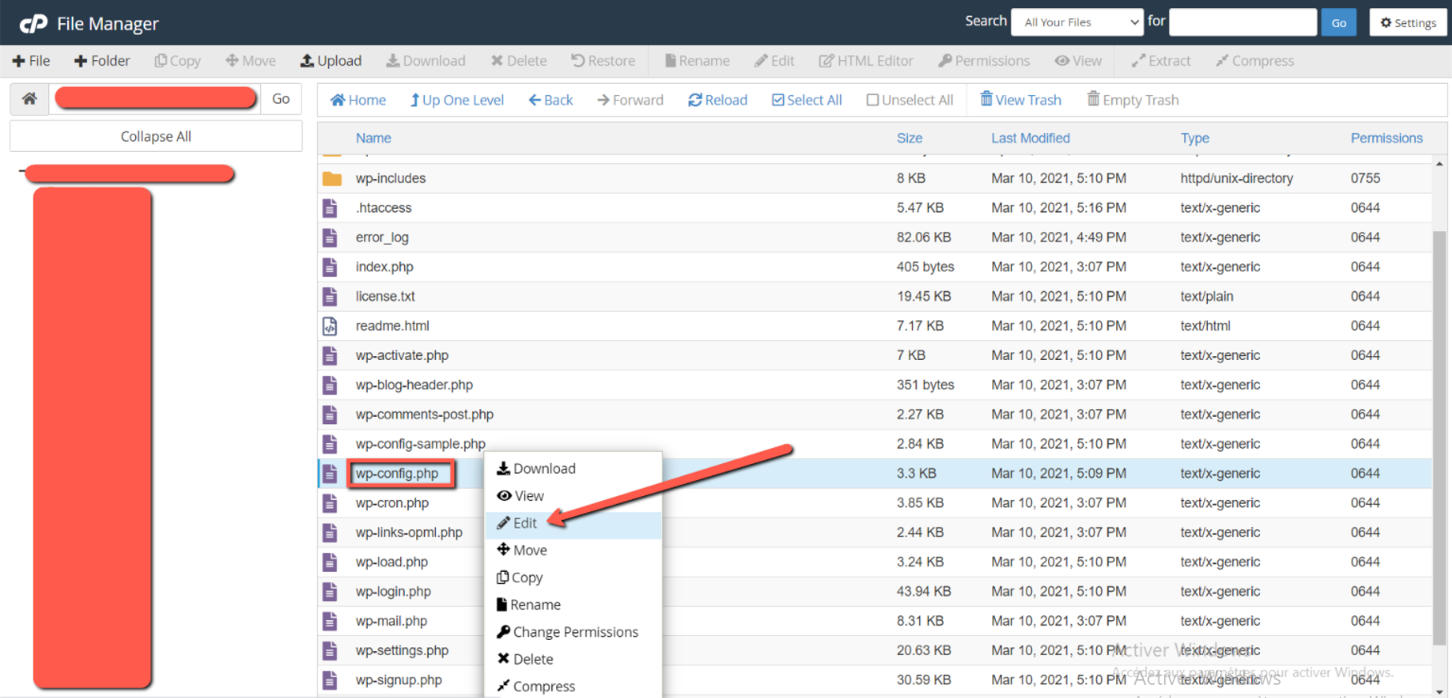
- 15. Now we need to make sure the PHP files from WordPress can access the database. Go to File Manager and find the file called "wp-config.php". Open this file in a text editor
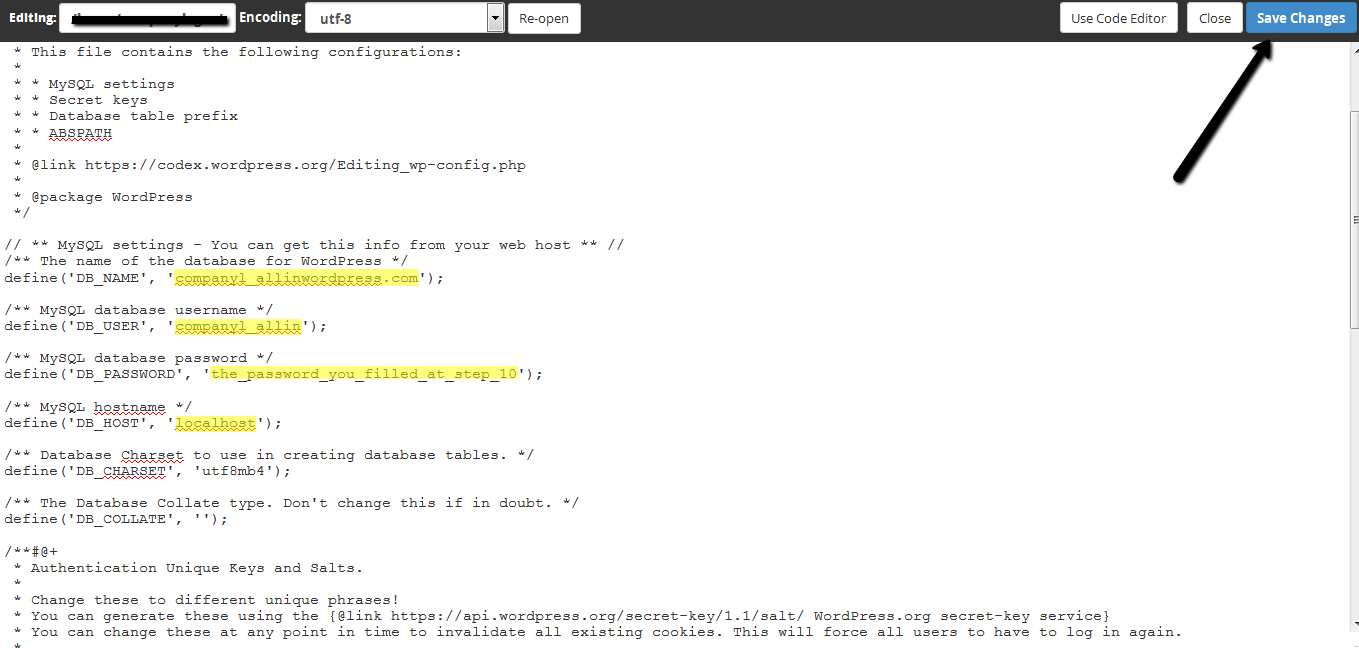
- 16. In "wp-config.php", edit the database name, database user name and database password. Use the values that you created in step 9 and 10.
With some hosts you also have to change the hostname, but with 95%+ of hosting companies, you can leave this as "localhost". For example with iPage it is "UsernameOfYourAccount.ipagemysql.com"
- 17. That's it! Your WordPress website should now work.
WordPress Installation: Troubleshooting
Method 2: using FTP
This Tutorial explains how you can recover a website from the Waybackmachine. It also explains exactly how you can upload the files with Cpanel and FTP.
- 1. Download the .zip file with all the HTML files. Extract the files (unzip) to a folder of your choice.

- 2. You need to transfer the files to the server using FTP software. If you don't have an FTP client already, then we recommend FileZilla: https://filezilla-project.org/
- 3. If you don't already have an FTP account at your hosting provider, then create one. If your host uses cPanel, then find the icon that says "FTP Accounts" (most hosting providers use cPanel: Hostgator, Godaddy, BlueHost : all of them use cPanel)
cPanel example:

It's usually easier to create an FTP account when adding a domain to your hosting:

- 4. Find the IP address of your server. In GoDaddy you can find your IP address on the hosting dashboard:

- 5. We use FileZilla for Windows in this guide, but you can also download it for Apple computers.
You should now have an FTP account and know your IP address. Open an FTP client. We use FileZilla in this guide.
- Fill in your username and password.
- The username should be yourname@yourdomain.com
- Host should be the IP address of your server, that will host the Wayback files.
- Port can be blank.
- Press Quickconnect to connect.

- 6. Now select all the files and move them to the remote site:

- 7. Your site should work now.
Diagnostic des anomalies
Only the front page works, or the front page has layout issues or broken links
You are probably viewing the website on your own computer, or the .htaccess file somehow wasn't uploaded to the server correctly. It's also possible your hosting provider doesn't use Apache. You must use Apache.
In the ZIP file, there is a file called ".htaccess". Make sure that this file is also present on your server. It's a hidden file, and some file managers don't extract these hidden files. If it's not present on your server, simply extract it on your own computer, and then upload the file to the server. Place it in same folder as index.html.
Incorrect server or DNS configuration
If you managed to do all the steps above and your site still doesn't work, then make sure that the HTML files are located in the folder public_html/yourdomain.com/. You can check this with an FTP account with admin rights, or go to cPanel > File Manager. Check if the files are indeed located in public_html/yourdomain.com/.
If you are trying to install the WordPress version, then place a simple index.html in this folder. Then browse to the domain and see if the index file is portrayed correctly. If it doesn't show, then there is probably something wrong with your server configuration (for example, you didn't create an addon domain) or with your DNS settings (check your name server configuration).
Redirect loop error

When you have an unexpected redirect loop error ("domain.com redirected you too many times"):
1. For WordPress users, this is usually caused by incorrect file/folder permissions. This should be 755 for all folders and sub-folders. It should be 644 for all files. For information on how to set permissions see this guide
2. The redirect loop can also be caused by corrupted files after using cPanel to unzip the files. Try to extract (unzip) the files locally and then transfer them via FTP software in an uncompressed form.
I am getting an error when editing or creating a new post/page. (WordPress)
On some websites and with certain configurations, when attempting to edit or create a new post or page, you may encounter the following error: 'Publishing failed. The response is not a valid JSON response.'
To fix this problem, you should install and activate the Classic Editor plugin.
Installation service
If it still doesn't work, we can also do it for you. Just send $20 to our Pay Pal account and an email to our support address with your hosting account details. For WordPress installations, this charge is a fixed $30. You can pay via this form